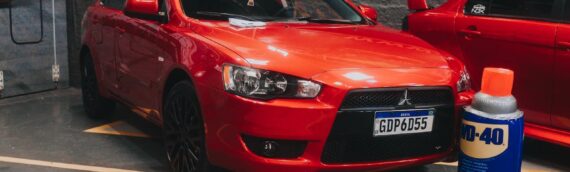
Ever wondered how to achieve flawless paint on your car? Dive into our comprehensive guide on the do’s and don’ts of paint correction. Ready to uncover the secrets that will make your vehicle shine like never before? Let’s explore the essential tips, tricks, and pitfalls to avoid for a professional-grade finish. Whether you’re a novice or a seasoned enthusiast, this guide has got you covered from start to finish. Get ready to elevate your detailing game and unleash the full potential of your vehicle’s exterior. Are you prepared to transform your car into a head-turning masterpiece? Let’s get started!

Understanding the Basics of Paint Correction
Removing Imperfections
Paint correction involves removing imperfections from a vehicle’s paintwork to restore its clarity, shine, and smoothness. These imperfections include swirl marks, scratches, and oxidation. To correct these issues effectively, it is crucial to use the right tools and techniques.
To illustrate further, imagine your car’s surface with visible swirl marks caused by improper washing or drying methods. Through paint correction, these unsightly marks can be eliminated, leaving behind a glossy and flawless finish that enhances the overall appearance of your vehicle.
Restoring Clarity and Shine
The primary goal of paint correction is to bring back the original clarity and shine of your car’s paintwork. By carefully removing imperfections like scratches or oxidation damage using specialized compounds and polishes, you can achieve a mirror-like finish that reflects light beautifully.
When considering paint correction for your vehicle, keep in mind that professional detailing services often utilize advanced techniques such as machine polishing to ensure optimal results. This process not only enhances the aesthetic appeal but also provides long-lasting protection for your car’s paintwork against environmental elements.
Essential Tools and Materials for Effective Paint Correction
Necessary Tools
To achieve successful paint correction, certain tools are indispensable. A dual-action polisher is at the top of the list. This versatile tool allows you to correct imperfections in the paint without causing damage, making it a must-have for any detailing enthusiast. It provides both power and control, ensuring a smooth and even finish on your vehicle’s surface.
High-quality microfiber towels are essential. These towels are gentle on the paint yet effective at removing excess product without leaving behind lint or scratches. They play a crucial role in achieving that flawless, glossy finish that every car owner desires.
Key Equipment
In addition to a dual-action polisher and microfiber towels, using clay bars or clay mitts is vital for effective paint correction. These tools help eliminate embedded contaminants from the surface of your vehicle’s paint. By gently gliding them over the surface, they pick up dirt, grime, and other impurities that regular washing cannot remove.
When engaging in paint correction, having these essential tools ensures that you can tackle imperfections effectively while maintaining the integrity of your vehicle’s paint job.
Preparing Your Vehicle for Paint Correction
Washing and Drying Your Vehicle
Before diving into the paint correction process, it’s crucial to give your vehicle a thorough wash and dry. This step ensures that the surface is clean from dirt, grime, and other contaminants that could interfere with the correction process. Use a high-quality car wash shampoo and follow up with a complete drying to prevent water spots.
To protect sensitive areas of your vehicle during paint correction, such as rubber trim, plastic trim, and emblems, masking them off is essential. By taking this precautionary measure, you can prevent accidental damage or discoloration to these delicate parts while working on correcting the paint job.
Measuring Paint Thickness
Utilizing a paint thickness gauge before proceeding with any correction work is vital. This tool allows you to accurately measure the thickness of the existing paint on your vehicle’s surface. Understanding the current state of your car’s paintwork helps in determining how much correction can be safely done without risking damaging the clear coat.
Pros:
- Ensures a clean canvas for effective paint correction.
- Prevents accidental damage to sensitive areas during the process.
- Provides valuable information about existing paint thickness for safe corrections.
Cons:
- Time-consuming process compared to directly starting with correction work.
Step-by-Step Guide to DIY Paint Correction
Perform Test Spot
Before diving into the full paint correction process, it’s crucial to perform a test spot on a small area of your vehicle. This step helps determine the right combination of products and techniques that will work best for your car’s paint. By doing this, you can avoid causing any damage to the entire surface.
Starting with a test spot allows you to see how different polishes or compounds interact with your specific paint type. It gives you an opportunity to adjust your technique based on the results you achieve in that small area.
Work in Small Sections
When proceeding with the actual paint correction, remember always to work in small sections. Applying polish evenly and using overlapping passes with the polisher ensures consistent results across all areas of your vehicle’s paintwork.
By tackling one section at a time, you can give each part of the car equal attention and care during the correction process. Working methodically through these smaller areas also allows for better control over achieving optimal results without missing spots.
Regularly Check Your Progress
Throughout the paint correction process, make sure to regularly check your progress by inspecting the paint under various lighting conditions. Natural light is ideal for spotting imperfections like swirl marks or scratches that may still be present after polishing.
Inspecting under different lighting angles will help reveal any flaws that might not be apparent initially. It allows you to address these issues promptly before moving on to other sections of your vehicle, ensuring thorough correction overall.
Advanced Techniques in Paint Correction
Wet Sanding for Deeper Imperfections
Wet sanding is a technique used to eliminate deep scratches and imperfections that cannot be removed through regular polishing. This method involves using sandpaper with water to gently remove layers of paint, revealing a smoother surface underneath. For instance, when dealing with deep scratches, wet sanding can be an effective way to level out the damaged area before proceeding with the correction process.
Using wet sanding requires precision and caution as it can easily damage the original paint if not done correctly. It is crucial to start with a higher grit sandpaper and gradually move to finer grits to ensure a smooth finish without causing further harm. Professional detailers often utilize wet sanding as part of their arsenal in tackling stubborn paint defects that are resistant to other methods.
Rotary Polisher for Aggressive Correction
A rotary polisher is a powerful tool that allows for more aggressive correction compared to dual-action polishers. However, it demands skill and experience due to its high speed and potential for causing damage if mishandled. When dealing with severe imperfections like deep scratches or heavy swirl marks, a rotary polisher can provide the needed cutting power to restore the paint surface effectively.
While rotary polishers excel at correcting significant blemishes, they also pose risks such as creating buffer trails or burning through the paint if not used properly. Proper technique, including maintaining consistent movement and pressure, is essential when employing a rotary polisher during the paint correction process. Professional detailers often undergo training specifically focused on mastering this tool for achieving exceptional results.
Ceramic Coating for Long-Lasting Protection
After completing the paint correction process, applying a ceramic coating offers long-lasting protection against environmental contaminants and UV rays while enhancing gloss levels on the painted surface. Ceramic coatings create a durable barrier that repels dirt and water, making maintenance easier over time by reducing the likelihood of new blemishes appearing on freshly corrected surfaces.
Professional detailers recommend incorporating ceramic coatings into post-correction treatments due to their ability to preserve the corrected finish for an extended period compared to traditional waxes or sealants. By adding this final layer of protection after addressing all visible imperfections through machine polishing techniques like stage polishing or buffing out fine scratches, car owners can enjoy an enhanced appearance coupled with superior defense against future damages.
Do’s and Don’ts of Paint Correction
Proper Safety Equipment
When engaging in paint correction, it is crucial to prioritize safety. Always wear gloves and eye protection when handling chemicals to prevent any accidents or skin irritations. These items act as a shield, guarding you against harmful substances that could potentially cause harm.
It’s essential to remember that these safety precautions are not optional but necessary for your well-being. By using the right protective gear, you ensure that your experience with paint correction is not only successful but also safe.
Pros:
- Ensures personal safety
- Prevents chemical-related injuries
Patience Is Key
One of the most significant aspects of achieving flawless results in paint correction is avoiding rushing through the process. Taking your time allows you to be meticulous in your work, ensuring every detail receives the attention it deserves.
By being patient and methodical, you can address imperfections effectively without causing further damage to the vehicle’s surface. Rushing through paint correction may lead to subpar outcomes, leaving behind swirl marks or uneven finishes.
Pros:
- Achieve high-quality results
- Prevent mistakes and errors
Cons:
- Time-consuming process
Adhering to Manufacturer’s Instructions
Each product and tool used in paint correction comes with specific guidelines provided by its manufacturer for optimal performance. It is crucial to always follow these instructions meticulously.
Protecting Your Car’s Finish After Paint Correction
Applying Wax or Sealant
After completing the paint correction process, it is crucial to apply a high-quality wax or sealant to safeguard the newly corrected paint. This protective layer acts as a shield against environmental contaminants and UV rays, ensuring that your car’s finish remains glossy and pristine. By regularly applying wax or sealant, you can prolong the longevity of the correction work done on your vehicle.
To maintain the freshly corrected paint, opt for regular washing using a pH-neutral car shampoo. This gentle formula helps preserve the integrity of both the correction work and any protective coatings applied. Washing your car frequently removes dirt, grime, and other pollutants that can degrade the finish over time. Using a pH-neutral shampoo prevents stripping away any wax or sealant previously applied during maintenance sessions.
Utilizing Paint Protection Film (PPF)
Consider incorporating paint protection film (PPF) in vulnerable areas of your vehicle to provide an extra layer of defense against scratches, chips, and other damages. PPF is a transparent film that adheres to the surface of your car’s clear coat without altering its appearance significantly. It serves as a sacrificial barrier between potential hazards like road debris and your vehicle’s delicate paintwork.
Pros:
- Enhances protection against physical damage.
- Maintains original paint quality.
- Easy removal without leaving residue.
Cons:
- Initial cost may be high.
- Professional installation recommended for optimal results.
Maintaining Your Car’s Finish Post-Correction
Avoiding Swirl Marks
Automatic car washes with brushes can introduce swirl marks to your car’s paint. These marks are circular and can be quite noticeable under direct light. To prevent this, opt for hand washing or touchless car washes that do not use brushes.
Swirl marks can detract from the flawless finish achieved through paint correction. They result from abrasive materials coming into contact with the paint surface, creating tiny scratches that reflect light unevenly. By avoiding automatic car washes with brushes, you protect your vehicle’s newly corrected finish.
Using Microfiber Drying Towels
After washing your car, it is crucial to dry it properly to avoid water spots and potential scratching of the paintwork. Instead of using a regular towel or chamois cloth, opt for a dedicated microfiber drying towel. Microfiber towels are gentle on the paint and help absorb water efficiently without causing scratches.
Microfiber towels have densely packed fibers that attract dirt and moisture effectively while being soft on the delicate clear coat of your vehicle. This reduces the risk of introducing new imperfections post-correction due to improper drying techniques.
Scheduling Regular Maintenance Sessions
Regular maintenance sessions play a vital role in preserving the results of paint correction over time. Despite taking precautions during washing and drying, minor imperfections may still appear on the surface over time due to environmental factors like bird droppings or tree sap.
Conclusion
You’ve now mastered the ins and outs of paint correction, from the basic concepts and tools to advanced techniques and maintenance tips. Remember, a well-corrected paint job not only enhances your car’s appearance but also protects it from the elements. By following the do’s and avoiding the don’ts, you’re on your way to a flawless finish that’ll turn heads on the road. So, grab your gear, roll up your sleeves, and get ready to give your vehicle the TLC it deserves!
Revitalize and Protect: Car Wash 2Go’s Expert Paint Correction Services Delivered to Your Doorstep!
In the bustling cities of Birmingham and Nashville, keeping a vehicle’s paint pristine amidst the challenges of daily driving can seem daunting. Car Wash 2Go steps in as your trusted ally, offering unparalleled mobile paint correction services. Our expertise lies in applying “Professional Grade Ceramic Coating” directly at your location, not only cleaning your vehicle but also providing it with a durable layer that enhances its gloss and defends against the elements.
But we don’t stop at paint correction; our comprehensive interior and exterior detailing ensures every inch of your vehicle, from the intricate details of your interior to the robust surface of your exterior, receives meticulous attention. If you’re managing a fleet, Car Wash 2Go excels in giving each vehicle the exceptional treatment it deserves. And with our 2Go! Stay Clean Club, we pledge to keep your vehicle in immaculate condition all year round.
Your satisfaction is our ultimate goal, backed by our 100% Satisfaction Guarantee to address any concerns promptly and professionally. Don’t wait to provide your vehicle with the paint correction it needs. Choose Car Wash 2Go for an enhanced finish and superior appearance of your car’s paintwork. Available in Birmingham and Nashville, we’re ready to elevate your vehicle’s aesthetics. Click here to Book Now and see the difference Car Wash 2Go can make in safeguarding and beautifying your vehicle. Wherever you are in Birmingham or Nashville, we’re just a call away, prepared to deliver excellence.