
Avoiding common mistakes can make all the difference between a clear view and driving in the dark. From overlooking proper cleaning techniques to skipping protective coatings, these missteps can leave you seeing less clearly than before. By steering clear of shortcuts and opting for quality products, you can ensure your headlights shine bright like diamonds on the road. Stay tuned as we delve into five pitfalls to sidestep when reviving your car’s lights and illuminate your path with clarity.
1.Using Abrasive Materials
When restoring your car headlights, avoid using abrasive materials that can worsen the condition of the lens. Certain products like harsh chemicals or rough sandpapers can cause scratches and further damage. Opt for gentle cleaners and restoration kits specifically designed for headlights.
Using abrasive materials can lead to irreversible harm to your headlights, making them cloudy or hazy instead of clear and bright.
2. Neglecting Thorough Cleaning
One of the common mistakes during headlight restoration is neglecting to clean the headlights thoroughly beforehand. Dirt, grime, and debris on the surface can interfere with the restoration process. Make sure to wash and dry the headlights properly before starting any restoration work.
Neglecting thorough cleaning may result in an uneven finish after restoration, with some areas looking clearer than others due to dirt residue left behind.
3. Rushing Through Restoration
Avoid rushing through the restoration process without proper preparation. Take your time to follow each step carefully, from cleaning and sanding to applying sealant. Hastily completing the process can lead to subpar results or even premature deterioration of the restored headlights.
Rushing through restoration may cause you to miss crucial steps or apply products incorrectly, diminishing the effectiveness and longevity of your efforts.
4. Neglecting Regular Maintenance
Once you’ve restored your headlights, it’s essential to maintain them regularly to preserve the clarity and brightness of the lenses. This includes washing your car regularly to remove dirt and debris, applying a UV-resistant coating periodically to protect against sun damage, and inspecting the headlights for signs of oxidation or haze. By staying on top of maintenance, you can extend the lifespan of your headlight restoration and ensure optimal visibility on the road.
5. Skipping the Protective Coating
Many headlight restoration kits include a protective coating that helps to seal and protect the newly restored surface. Skipping this step can leave your headlights vulnerable to UV damage, oxidation, and environmental contaminants, reducing the longevity of the restoration. Always apply the protective coating according to the manufacturer’s instructions.
Understanding the Importance of Clear Headlights
Importance of Clear Headlights
Clear headlights are crucial for safe driving as they enhance visibility on the road, especially during nighttime and adverse weather conditions. Faded or yellowed headlights can significantly diminish your car’s lighting system’s effectiveness, posing risks to you and other drivers.
Properly functioning headlights ensure that you can see clearly ahead and be seen by other vehicles, pedestrians, and obstacles. Maintaining the original clarity of your headlights is essential for overall road safety.
Neglecting Regular Maintenance
Neglecting regular maintenance routines is a common mistake. Over time, dirt, debris, and oxidation can accumulate on the surface of the headlights, leading to reduced brightness and visibility. By overlooking routine cleaning and upkeep, you risk compromising your safety on the road.
To avoid this mistake:
- Clean your headlights regularly with mild soap and water.
- Use a specialized headlight cleaning kit for deeper cleaning.
- Apply a protective coating to prevent future damage from UV rays.
Using Incorrect Restoration Methods
Using incorrect restoration methods can worsen rather than improve headlight clarity. Some DIY remedies found online may involve abrasive materials or harsh chemicals that can damage the headlight lens instead of restoring it. It’s essential to use gentle yet effective products specifically designed for headlight restoration.
Remember:
- Follow manufacturer guidelines when choosing restoration products.
- Test any new product on a small area before applying it entirely.
- Seek professional help if unsure about the restoration process.
Ignoring Professional Help
Ignoring professional help is another mistake many car owners make when attempting to restore their headlights. While DIY kits are available in stores, seeking assistance from experts ensures proper restoration without causing harm to the vehicle’s exterior or interior components.
Avoid these errors by:
- Consulting with professionals at auto repair shops.
- Seeking recommendations from trusted sources for reliable services.
- Comparing quotes from different providers before making a decision.
Recognizing Deteriorating Headlights
Signs of Deteriorating Headlights
Dull or hazy headlights are indicators of deteriorating headlight quality. Yellowing and discoloration can result from exposure to UV rays and oxidation over time. Scratches and cracks on the headlight lens will significantly affect its performance.
When your headlights start showing a dull appearance, it’s crucial not to ignore these signs, as they can compromise visibility while driving at night. The haze that forms on the surface scatters light, reducing brightness and making it harder for you to see clearly on the road at night.
Neglecting Regular Maintenance
Failing to maintain your headlights properly is a common mistake many car owners make. Simple steps like regularly cleaning the headlights with appropriate products can prevent damage caused by debris buildup or environmental factors such as UV rays.
Regularly inspecting your headlights for any signs of wear and tear is essential in maintaining their longevity. By neglecting this aspect of car maintenance, you risk allowing minor issues like scratches or cloudiness to escalate into more significant problems that may require costly repairs or replacements down the line.
Using Incorrect Restoration Methods
Choosing improper restoration methods when trying to fix deteriorating headlights can worsen the situation instead of improving it. Some DIY kits available in the market might contain harsh chemicals that could cause further damage instead of restoring clarity.
Opting for professional detailing services from reputable companies like Detailing Devils ensures that proper techniques and products are used during the restoration process. These professionals have experience in handling various types of headlight deterioration effectively without causing harm to the lenses.
DIY Headlight Restoration Guide
Gather Necessary Tools and Materials
Before embarking on your DIY headlight restoration project, ensure you have all the tools and materials required. Missing items can halt progress and affect the quality of your work. Essential supplies include sandpaper, a polishing compound, masking tape, and a sealant.
It’s crucial to have everything within reach to avoid interruptions during the restoration process. Imagine starting only to realize halfway through that you need more sandpaper or a specific type of polish. This could lead to uneven results or even damage to your headlights.
Follow a Step-by-Step Guide
To prevent errors in headlight restoration, follow a detailed step-by-step guide meticulously. Each step plays a vital role in achieving clear headlights once again. Skipping steps or performing them out of order can compromise the outcome.
By adhering strictly to each instruction, you ensure that every aspect of the restoration process is covered thoroughly. For example, if one step involves using different grits of sandpaper before applying polish, following this sequence is essential for optimal results.
Take Your Time and Be Patient
Rushing through DIY solutions for headlight restoration often leads to subpar outcomes. Patience is key when restoring car headlights as it allows each product applied time to work effectively. Hastiness might result in uneven polishing or incomplete removal of oxidation.
Consider headlight restoration as a meticulous task that requires attention to detail rather than something rushed through quickly. Taking breaks between steps can also help maintain focus and prevent fatigue from impacting your work.
Choosing the Right Materials for Restoration
Research Kits
When restoring your car headlights, it’s crucial to research different headlight restoration kits available. These kits often contain everything you need for the restoration process, such as sandpaper, sealant, and a protective coating. By exploring various options in the market, you can find a kit that suits your needs and budget.
Investigating different kits allows you to compare their contents and features. Some kits may include additional items like UV protection or specific cleaning solutions. Understanding what each kit offers helps ensure that you choose one with all the necessary components for an effective headlight restoration process.
Consider Lens Material
When selecting a headlight restoration product, it’s essential to consider the type of material your headlights are made of – typically plastic lenses. Different materials may require specific treatments or products to achieve optimal results during restoration. For instance, plastic lenses might respond better to certain cleaners compared to glass lenses.
The lens material plays a significant role in determining which restoration products will work best on your headlights. Certain chemicals or abrasive substances could damage specific lens materials if not compatible. Therefore, understanding the composition of your headlights’ lenses guides you in choosing suitable restoration materials.
UV Protection
Look for headlight restoration kits that include UV protection as part of their formulation or final coating application step. UV rays from sunlight can cause yellowing and cloudiness in restored headlights over time if left unprotected. Including UV protection in the restoration process helps prolong the clarity and effectiveness of the treatment.
Pros:
- Comprehensive research ensures selection of high-quality kit.
- Considering lens material prevents damage during restoration.
- UV protection extends the longevity of restored headlights.
Con:
- Inadequate research may lead to purchasing ineffective kits.
Step-by-Step Instructions for Successful Restoration
Masking Off Surrounding Areas
To begin the restoration process, it’s crucial to protect your car’s paintwork from any damage. Start by masking off the surrounding areas around the headlights using painter’s tape or plastic sheeting. This step prevents accidental scratches or marks on your vehicle during the restoration.
Taking this precaution ensures that only the headlights are worked on, leaving the rest of your car untouched and pristine. By carefully covering these areas, you can focus solely on restoring your headlights without worrying about causing harm to other parts of your vehicle.
Removing Oxidation and Scratches
The next step in restoring your car headlights involves eliminating oxidation and scratches that may have accumulated over time. You can achieve this by using sandpaper or a polishing compound specifically designed for headlight restoration. Gently work on the surface of the lens until you notice an improvement in clarity.
By addressing oxidation and scratches promptly, you enhance visibility while driving at night or in adverse weather conditions. This simple yet effective step process not only improves aesthetics but also ensures safety by providing optimal lighting output from your headlights.
Applying Protective Sealant
The final step in rejuvenating your car headlights is applying a protective sealant or clear coat to maintain their newfound clarity and prevent future damage. This coating acts as a barrier against UV rays, environmental elements, and general wear and tear that could degrade the restored surface.
This last step helps prolong the lifespan of your headlight restoration efforts, keeping them looking like new for longer periods. It simplifies future maintenance tasks since regular cleaning becomes easier with a protected surface.
Tips and Tricks for Professional-Looking Results
Using the Right Cloth
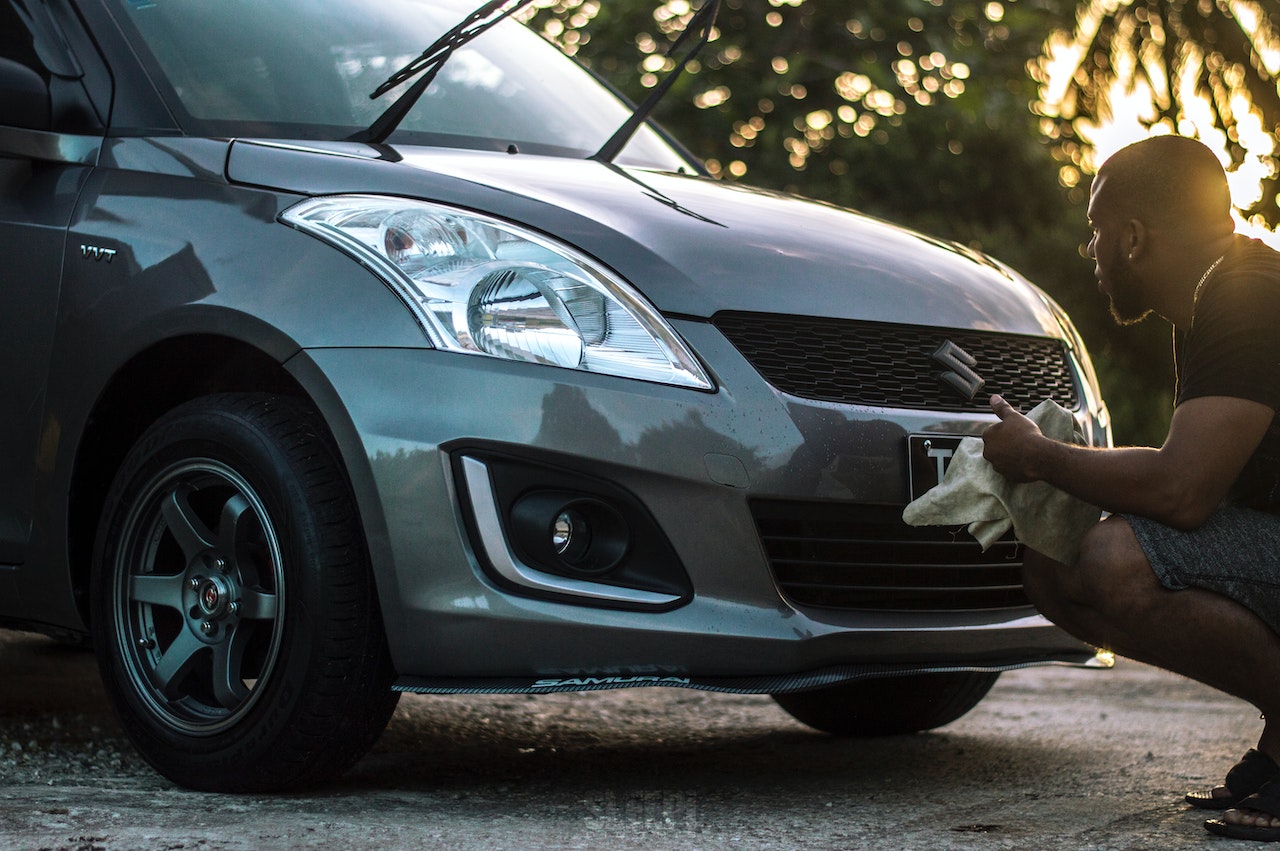
When restoring your car headlights, it’s crucial to use a microfiber cloth for applying cleaning solutions and polishes. This type of cloth is gentle on the surface of the headlight, preventing scratches that could affect the final appearance. By using a microfiber cloth, you ensure that the products are applied evenly and without causing damage to the headlight.
A microfiber cloth also helps in achieving a uniform finish, which is essential for professional-looking results. Unlike regular cloths that may leave lint or streaks behind, microfiber cloths pick up dirt and grime efficiently without leaving residue on the headlights. This simple switch can make a significant difference in how clear and polished your headlights appear after restoration.
Applying Even Pressure
To avoid uneven results when sanding or polishing your car headlights, always remember to apply even pressure throughout the process. Whether you are sanding away imperfections or polishing to enhance clarity, consistent pressure ensures that each part of the headlight receives equal treatment. This technique helps prevent over-sanding in certain areas while neglecting others, leading to a more balanced outcome.
Maintaining Newly Restored Headlights
Regular Cleaning
To maintain the clarity of your car headlights, it’s crucial to clean them regularly. Dirt and grime can build up over time, affecting visibility. Use a mild soap and water solution with a soft cloth to wipe down the headlights. Avoid harsh chemicals that could damage the clear coat.
Consistency is key. Make it a part of your regular car washing routine. By keeping them clean, you not only improve visibility but also prevent any residue from interfering with the uv coating on the headlights.
Applying Protective Coating
Applying a protective coating on your restored car headlights helps maintain their appearance and longevity. Look for products specifically designed for this purpose, such as UV-resistant coatings or sealants. These coatings act as a barrier against environmental elements that could degrade the restoration work.
When applying a protective coating, ensure that the surface of the headlight is clean and dry before starting. Follow the manufacturer’s instructions carefully to achieve optimal results without causing any damage to the clear coat or underlying materials.
Parking Considerations
Where you park your car can significantly impact the condition of your restored car headlights. Whenever possible, park in shaded areas to reduce exposure to direct sunlight, which can cause fading and deterioration of plastic surfaces over time due to UV rays.
If parking in shaded spots isn’t feasible, consider using a car cover as an alternative method for protecting your vehicle from UV damage. A car cover provides an extra layer of defense against harmful sun rays while also shielding other parts of your vehicle from potential wear and tear.
Debunking 3 Costly Myths About Headlight Restoration
Myth Debunked: Toothpaste as an Effective Restoration Method
Using toothpaste to restore car headlights is a popular DIY method. However, it only provides a temporary solution by removing surface grime rather than addressing the root cause of the yellowing. Professional restoration involves sanding and polishing, ensuring long-lasting clarity.
Applying toothpaste can give a quick fix but won’t last long-term. Opt for professional services that involve sanding away the damaged layer and sealing it properly for durable results.
Pros:
- Quick fix for minor issues
- Inexpensive option for short-term improvement
Con:
- Temporary solution
- Does not address underlying damage
Myth Debunked: Clear Coat Spray as a Permanent Fix
Another common misconception is that clear coat spray can permanently restore yellowed headlights. While clear coat spray might provide some improvement initially, it tends to wear off quickly due to exposure to sunlight and harsh weather conditions.
Clear coat sprays lack the durability needed for long-lasting headlight restoration. For a more permanent solution, consider professional restoration methods that involve proper cleaning, sanding, and sealing processes.
Pros:
- Easy application process
- Immediate improvement in appearance
Con:
- Short-lived results
- Requires frequent reapplication
Myth Debunked: Effectiveness of DIY vs Professional Services
Contrary to popular belief, DIY restoration methods are not always less effective than professional services. While simple home remedies may work temporarily on mild cases of oxidation or fogging, they often fail to deliver lasting results compared to professional techniques involving thorough cleaning and sealing processes.
Professional services offer expertise in assessing headlight condition accurately and applying appropriate treatments tailored to each specific case. This ensures better outcomes with longer-lasting clarity.
- Choose professional services for severe headlight damage.
- Use DIY methods for minor issues like light haze or fogging.
Conclusion
You’ve now uncovered the essential dos and don’ts. By understanding the significance of clear headlights, recognizing deterioration, and avoiding common mistakes, you’re on the right path to achieving professional-looking results. With the DIY guide, material selection tips, step-by-step instructions, and maintenance advice provided, you’re equipped to tackle headlight restoration successfully. Remember, debunking myths along the way ensures you make informed decisions for your car care needs. So go ahead, grab your tools, and give those headlights the makeover they deserve!
Revamp Your Ride: Car Wash 2Go’s Professional Car Headlight Restoration Services!
In the hustle and bustle of Birmingham and Nashville, maintaining clear and pristine headlights in the face of everyday driving challenges can feel like an uphill battle. Enter Car Wash 2Go, your go-to solution for expert mobile car headlight restoration services.
Utilizing state-of-the-art techniques and top-quality products, we go beyond mere cleaning to provide your headlights with a durable protective coating. This not only enhances their clarity and brightness but also shields them from the harsh elements of the road.
But our services don’t end there. Our thorough interior and exterior detailing ensure that every part of your vehicle receives the attention it deserves, from the intricate interior details to the robust exterior surfaces. If you’re managing a fleet, trust Car Wash 2Go to give each vehicle the exceptional treatment it needs.
And with our exclusive 2Go! Stay Clean Club, you can rest assured that your headlights will stay clear and bright all year round. Your satisfaction is our priority, backed by our 100% Satisfaction Guarantee. Should you have any concerns, our team is ready to address them promptly and professionally.
Don’t wait any longer to give your headlights the restoration they deserve. Choose Car Wash 2Go for a brighter, safer drive and elevate the appearance of your vehicle. Available in Birmingham and Nashville, booking our services is just a click away. Experience the difference Car Wash 2Go can make in rejuvenating and protecting your headlights. Wherever you are in Birmingham or Nashville, we’re here to deliver excellence right to your doorstep. Click here to Book Now and see the difference for yourself!